

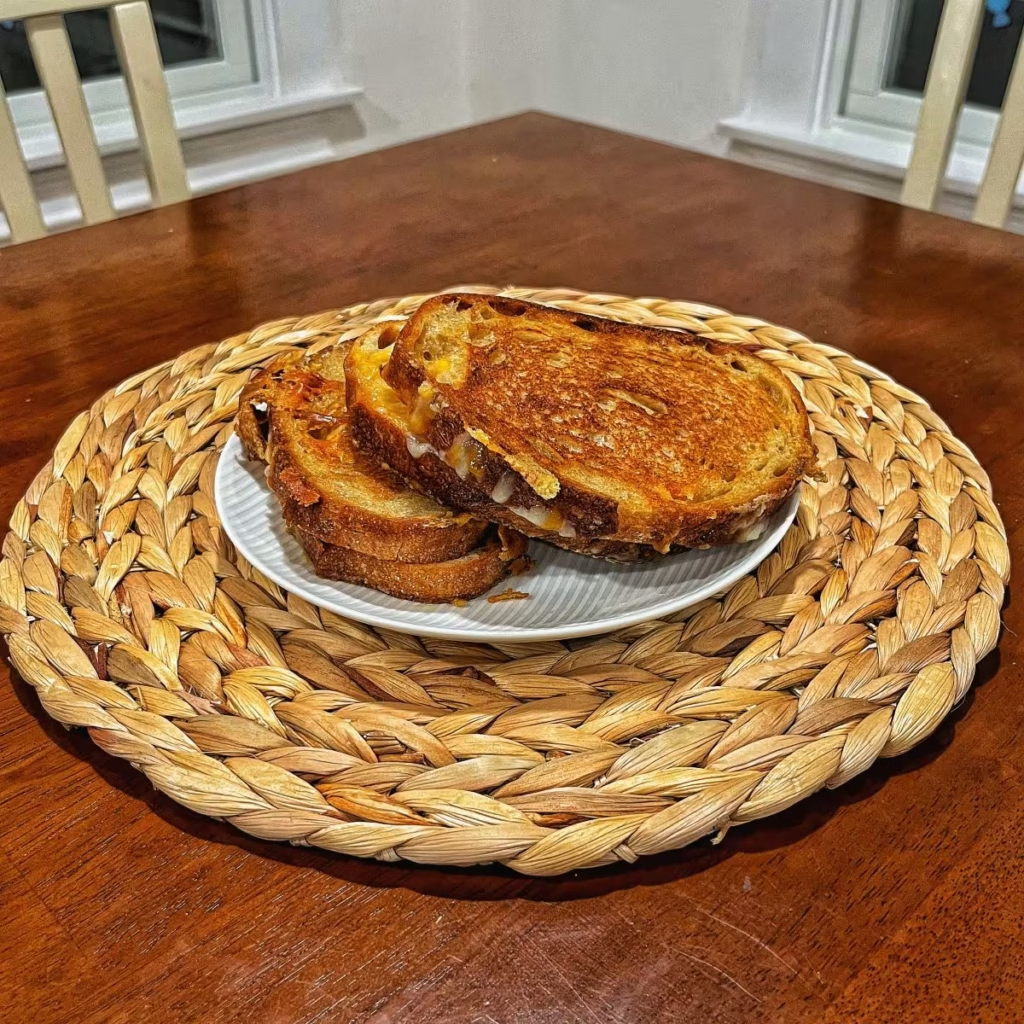

There is grilled cheese, and then there is the grilled cheese you make when little orange slices of plastic simply will not do.
After making what may or may not have been thousands of grilled cheese sandwiches, I narrowed my favorite cheeses down to Colby Jack and extra-sharp cheddar. Colby Jack melted beautifully but needed more flavor. Extra-sharp cheddar had plenty of personality but could overpower the sandwich.
One night, I combined them because I did not have enough of either cheese to use by itself. That accidental blend turned out to be exactly what I needed. Colby Jack brings the creamy melt, while the extra-sharp cheddar gives the sandwich its bite.
Put that cheese between two wide slices of sourdough, butter the bread all the way to the edges, and control the heat carefully. The result is a crisp, golden sandwich with plenty of melted cheese inside.
Why Colby Jack and Extra-Sharp Cheddar Work Together
Colby Jack is mild, creamy, and dependable when it melts. Extra-sharp cheddar has a stronger flavor, but it does not always melt as evenly on its own.
Combining the two gives you the best qualities of each cheese. The Colby Jack softens the sharpness of the cheddar, and the cheddar keeps the sandwich from tasting flat.
Freshly grated cheese also melts more smoothly than a thick stack of slices. Use the coarse side of your grater so the cheese stays loose and can be distributed evenly across the bread.
Why Sourdough Is Good for Grilled Cheese
Sourdough has enough structure to hold a generous layer of cheese without becoming flimsy. Its lightly tangy flavor also balances the richness of the butter and cheese.
Look for a loaf with broad, fairly square slices. Very thick bread can make it difficult to melt the center before the outside gets too dark, while thin or delicate slices may struggle to hold the filling.

Recipe Road: Stop #1
Learning Stovetop Heat Control with Grilled Cheese
This grilled cheese is the first building block in our Recipe Road series because it teaches one of the most useful lessons in cooking: how to control the heat on your stovetop.
When I first started cooking, I cooked almost everything on high. Eggs? High. Vegetables? High. Chicken? High. I burnt the s#!t out of nearly everything I touched.
The Goal of This Stop
Your goal is to give the cheese enough time to melt without burning the bread. Too little heat leaves you waiting several lifetimes for lunch. Too much heat gives you blackened bread with a cold center.
Grilled cheese is a forgiving way to practice because you can watch the bread, listen to the butter, and make small adjustments while the sandwich cooks.
Find the Right Starting Temperature
Begin with the burner between medium-low and medium. Allow a nonstick, aluminum, stainless steel, or carbon steel skillet to warm for one to two minutes. Give a cast-iron skillet four to five minutes because it heats more slowly.
Place a small pat of butter in the center of the pan. It should sizzle and foam, then begin turning light brown after about 20 to 30 seconds.
If the butter does not brown, increase the heat slightly. If it turns dark immediately, lower the heat and give the pan a moment to cool.
Adjust the Heat as You Cook
The temperature of the pan changes when you add food. The bread and cheese absorb heat, so you may need to raise the burner slightly after the sandwich goes into the skillet.
Lift a corner of the bread occasionally and look at the color. If it is browning faster than the cheese is melting, lower the heat. Flipping the sandwich will also move the darker side away from the hot pan while you make the adjustment.
Know When the Heat Is Right
The bread should become evenly golden while the cheese softens and melts. If the bread stays pale for several minutes, raise the heat a little. If dark spots appear before the cheese begins to melt, lower it.
Key Idea: Burner settings are only a starting point. The color of the bread, the sound of the butter, and the way the cheese is melting tell you what the pan actually needs.
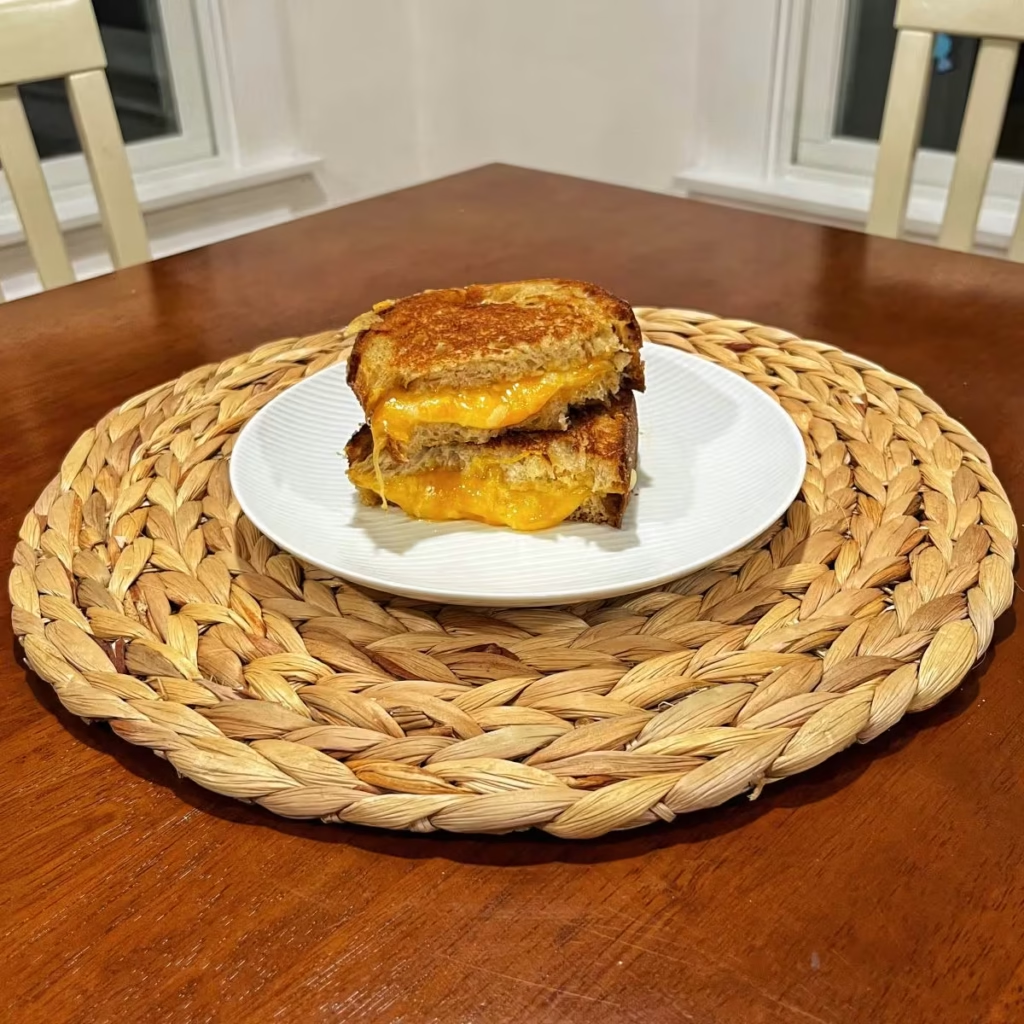
How to Keep the Bread Golden While the Cheese Melts
Butter the bread completely, including the edges. Bare patches toast differently and can leave the sandwich unevenly browned.
Pile the grated cheese loosely instead of pressing it into a dense layer. Air between the shreds helps the heat move through the filling.
Cook the first side briefly, then flip the sandwich and gently press it with your spatula. Continue cooking until the underside is golden and the cheese has begun to melt. Flip it again to finish the first side.
If the bread is ready before the cheese, lower the heat and continue cooking. A slightly longer cooking time at gentler heat is better than burning the outside.
Tips for a Better Sourdough Grilled Cheese
- Read through the recipe and prepare everything before heating the skillet.
- Take the butter out of the refrigerator about an hour before cooking so it spreads without tearing the bread.
- Grate both cheeses with the coarse side of the grater.
- Choose wide sourdough slices that are not excessively thick.
- Start with one sandwich at a time until you are comfortable controlling the pan.
- Serve it immediately while the bread is crisp and the cheese is hot.
This sandwich is excellent with tomato soup for dipping. Once you learn to balance the burner temperature with the color of the bread, you can use the same stovetop heat-control lesson for countless other recipes.
Sourdough Grilled Cheese with Colby Jack and Extra-Sharp Cheddar
Description
Crisp sourdough grilled cheese made with Colby Jack and extra-sharp cheddar. Careful stovetop heat control gives the bread a golden crust while the freshly grated cheese melts smoothly inside.
Full Ingredients
Instructions
Cooking Instructions
-
Prep the Bread
Remove eight slices of sourdough from the loaf and arrange them in four pairs. Spread the softened butter evenly over the outside of every slice, coating the bread all the way to the edges.
-
Prepare the Cheese
Coarsely grate the Colby Jack and extra-sharp cheddar. Gently toss the two cheeses together until evenly combined.
-
Preheat the Pan
Set a large skillet between medium-low and medium heat. Preheat it for one to two minutes, or four to five minutes if using cast iron. Add a small pat of butter. It should sizzle and foam, then begin turning light brown after about 20 to 30 seconds. Adjust the burner slightly if the butter browns too quickly or does not brown at all.
-
Cook the Sandwiches
Place one slice of bread in the skillet with the buttered side down. Add a loose layer of the cheese mixture about 1/2 inch thick, then place the second slice on top with the buttered side facing up. Cook for about 1 minute, then carefully flip the sandwich. Press it gently with a spatula and cook for 2 to 3 minutes, until the underside is golden and the cheese has begun to melt. Flip once more and cook until the second side is golden and the cheese is fully melted. Lower the heat if the bread is browning before the cheese melts. Remove the sandwich from the pan and repeat with the remaining ingredients. Cook two sandwiches at once only if your skillet has enough room for both to sit flat.
Nutrition Facts
Servings 4
- Amount Per Serving
- Calories 913.34kcal
- % Daily Value *
- Total Fat 57.25g89%
- Saturated Fat 33.73g169%
- Cholesterol 155.71mg52%
- Sodium 1530.07mg64%
- Potassium 253.21mg8%
- Total Carbohydrate 61.63g21%
- Dietary Fiber 2.49g10%
- Sugars 5.73g
- Protein 39.12g79%
- Vitamin A 1656.5 IU
- Calcium 853.18 mg
- Iron 4.96 mg
- Vitamin D 0.68 mcg
- Vitamin E 1.31 mg
- Vitamin K 5.16 mcg
- Thiamin 0.83 mg
- Riboflavin 0.95 mg
- Niacin 5.55 mg
- Vitamin B6 0.21 mg
- Folate 162.04 mcg
- Vitamin B12 1.11 mcg
- Pantothenic Acid 0.76 mg
- Phosphorus 642.75 mg
- Magnesium 66.71 mg
- Zinc 5.02 mg
- Selenium 56.87 mcg
- Copper 0.22 mg
- Manganese 0.61 mg
* Percent Daily Values are based on a 2,000 calorie diet. Your daily value may be higher or lower depending on your calorie needs.
